Given these videos can be accessed at a time and place convenient to health consumers, they provide a useful information resource alongside discussions held with clinical staff and local written information resources.

As a team of nurses from Wellington Hospital intensive care unit (ICU), we have been developing nationally available, evidence-based health education videos for a clinical specialty often seen as a stressful and foreign environment to patients and visitors, with unfamiliar sounds, sights and experiences.
Providing quality information in the ICU is key to enabling effective decision-making and engendering psychological safety for the critically ill patient and their support network. However, with so much information covered in key meetings with clinical staff at time-critical points in the ICU stay, education videos offer a reliable source of information that can be returned to at any time.
Drawing on our experience, this paper provides a practical guide for nurses looking to develop information videos in their work area.
Why health education videos?
Health education videos are used to improve patient knowledge, increase satisfaction with care, facilitate greater decision-making capability and reduce levels of anxiety in patients and whānau.1 With particular uptake in surgical and oncology settings, videos often focus on information-heavy areas that can result in high stress levels.2 Within critical care settings, there are crucial transition points where information loading and distress levels can be high such as admission to,3 and discharge from critical care.4 Information videos can be a useful additional resource at this time.
When thinking about developing health education videos, it is important to consider how people learn. We process visual and auditory information simultaneously in our cerebral cortex. Known as the dual-channel principle,5 this means that information obtained through listening to and watching videos can be processed, understood and retained. However, when incoming information exceeds the capacity of the audio and visual channels, cognitive overload occurs and learning ceases. 6 7 Use of concise narration with short captioned video sections and good quality sound maximises effective use of working memory pathways. 8
Taking on board these principles, we have developed short patient and whānau-focussed videos to assist with: patient admission to critical care; discharge from critical care; and preparing patients for the first 24 hours in intensive care after cardiac surgery (hosted by an ex-patient). We are also developing a video about intensive care survivorship to be filmed in ex-patient’s homes.
“Providing quality information in the ICU is key to enabling effective decision-making and engendering psychological safety for the critically ill patient.”
In all of our videos, which were supported by charitable grants, we followed a step-wise approach consisting of scoping, pre-production, production and post-production. In this paper, we describe this approach and some of the lessons learnt.
How to begin: Scoping
Before you start any project, it is important to know what is already out there and where the gaps are. It is essential to know that you are not replicating something already available and that your project will have impact and value for money.
Each of our video projects began by scoping existing resources to identify relevant videos using search engines (for example, Google) and on-line video-sharing platforms (for example, YouTube). Current clinical guidelines or seminal academic papers in topic were identified through on-line searches and by reaching out to local clinical networks (such as ICU nurse educators). Each resource was reviewed and key details noted, such as country of origin, date, video content and innovative filming approaches. This was key to inform our thinking about content and design options.
Preparing to film: Pre-production
Building in time for pre-production is important to deliver a quality video. Detailed planning is important in this phase, as is identifying the right people with the right skills to develop the video. Pre-production also includes development of the video script and scene outline.
Each of our videos were carefully planned over a four to six month period using a GANNT chart. This ensured timely delivery alongside our other workloads. The project team members were the experts who brought clinical expertise and wider skills (such as writing the script, facilitating meetings, simulation expertise). The project team comprised of nurse educators and, depending on the focus of the video, also included intensivists, clinical psychologists and ex-patients. Projects funded by external grants required larger governance groups to provide project oversight.
It was also important to have input from subject matter experts (SMEs) in the field. Using our clinical networks, we were able to identify SMEs from disciplines across the motu. For each project, two SME meetings were set up: the first to review the script and the second to review the initial cut of the video. We were able to identify a videographer, proficient in filming, directing and editing. In reviewing their previous work, we were confident they could work within the sensitive hospital setting and deliver high-quality, professional videos.
Having identified the team needed to produce the videos, the next step was to develop the video script. This takes time and requires many iterations. Achieving the right balance between using accessible language for patients and whānau whilst delivering the appropriate level of detail for long-term use was key. We had to present all of this in a way that wasn’t overwhelming or alarming. Once the script was developed, it was reviewed by the SME group and any changes made.
Once the script was finalised, a storyboard was created. The storyboard provides a scene-by-scene outline of how the video will unfold. It tells the story of the video detailing what will happen, how it will happen, who will be involved, what will be said, and where it will be filmed. In our videos, we used one key person (the host) to deliver the main script straight to camera. We then used general ICU and hospital shots or simulated patient and whānau situations as supporting film to visually detail what was being spoken about (B roll footage). The final video was planned to cutaway from the host to the B roll.
From the storyboard, a shoot schedule was developed (table 1), specifying the time allocated to film each scene along with the location, required action, actors (or talent), and necessary equipment or props. Selecting the location for filming was challenging in order to keep disruption to clinical care, staff and visitors, at a minimum. Mapping out the timeframe for the shoot helped anticipate and prevent any issues. Filming was planned for when the area was most likely to be quiet or available and we have used commissioned but unopened beds and empty cubicles for all of our filming. Selection of the hosts and actors was the final consideration and these were sourced from clinical contacts and families of staff.
Table 1: Example of production shoot schedule
Location/filming time/action/talent/equipment/props/voiceover script
| ICU Bed space 20 minutes |
Dynamic shot, wide to narrow focus indicating admission into bed space to support text. Patient lying quietly in the bed with nurse A and B calm but busily connecting equipment. | Patient Nurse A and B | Patient in bed intubated with, chest drains, external pacemaker, central and arterial line and full patient monitoring. Bed space setup with all equipment required for a cardiac admission. 2 x infusion pumps with propofol and noradrenaline running. | After your surgery, you’ll be moved from the operating theatre to the ICU whilst still asleep, where you’ll be looked after by the ICU and cardiac surgery team. |
| ICU Bed space 20 minutes |
Dynamic narrow to wide shot focussing on the monitors blood pressure alert. Shot then pans out to include patient. Patient sitting up, appears slightly concerned. Nurse A enters frame, silences the alert and reassures the patient. | Patient Nurse A | Patient in bed, sitting up and extubated with nasal prongs insitu. Bedside monitor in SIM mode. Heart rate, arterial and central line, Oxygen saturations all visible. Arterial blood pressure alarming marginally low. | You’ll be connected to a monitor that tracks your vital signs. If there are any changes, a machine alert will let the team know. This can be unsettling but it’s pretty normal and doesn’t necessarily mean there’s an emergency. |
Beginning with the end in mind, we identified the relevant platform to host the final videos early on. Initial contact was made with the web content and channels team for the info.health.nz Health New Zealand website to explain the project, timeframes and for us to understand upload and hosting processes for the platform.
Filming day: Production
Although methodical planning and set up is required for a smooth filming day, you still need to be prepared to pivot to accommodate the needs of the clinical environment around you. Filming days are long and intense. The team need clearly defined roles and responsibilities, for example director to support videographer, ICU and actor liaison, and simulation lead. Communication is key. We blocked filming into full days beginning with set-up at 7am, with close of day around 4.30pm after cleaning and reset of the clinical areas was complete.
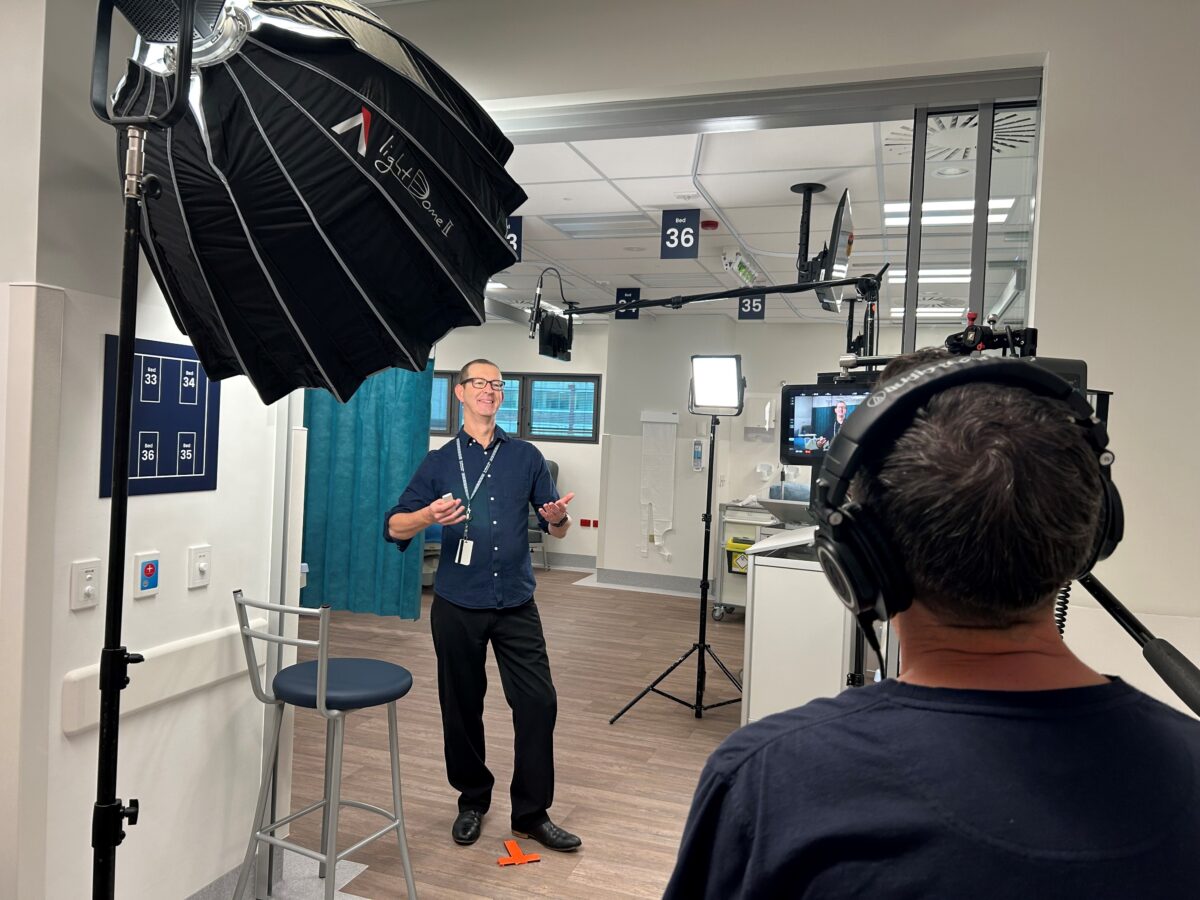
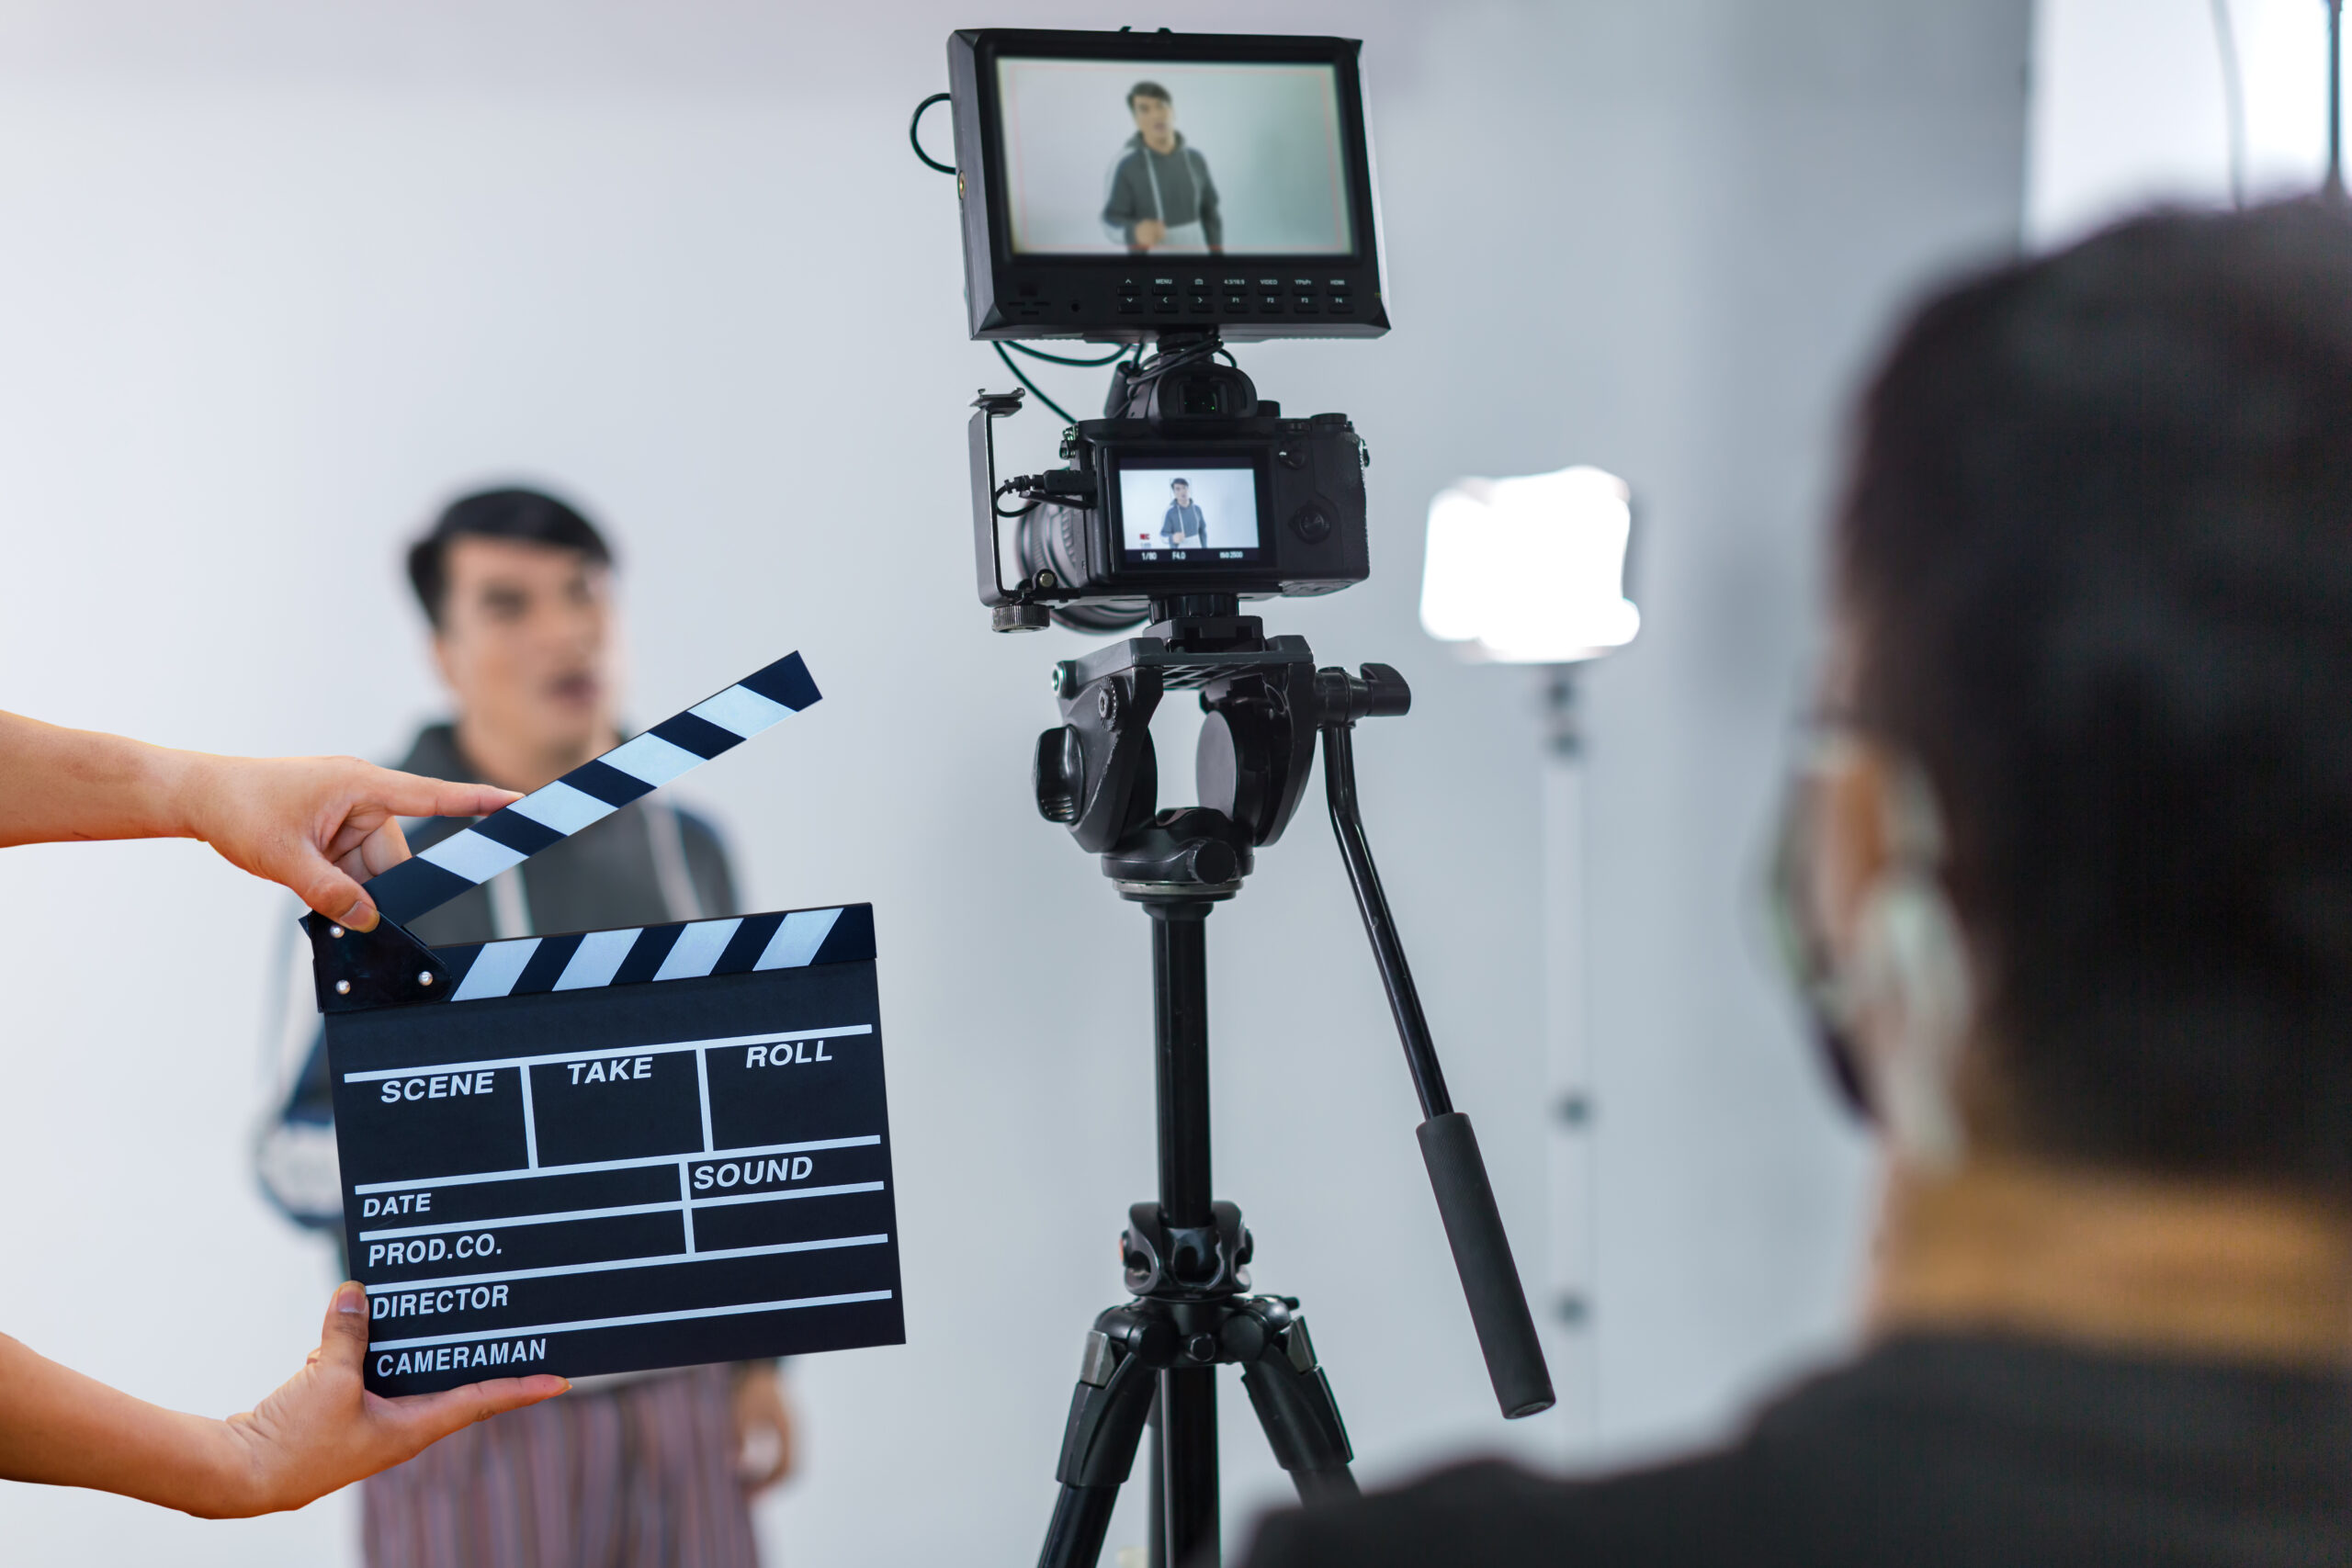
Using the pre-production shoot schedule to guide the production day, we first filmed the host delivering the entire script direct to camera (photo 1) before filming B roll footage. This meant that, regardless of what happened during filming, we always had the host film to fall back on. As clinical staff and their whānau were actors for the day, creating a relaxed and supportive atmosphere was essential for them to deliver natural performances and allowed the right balance of gravitas and warmth to come through.
“Filming days are long and intense. The team need clearly defined roles and responsibilities.”
Finally, there are significant ethical issues to consider when producing videos. All actors and those captured in background shots were consented. No patients or visitors were filmed so there was no breach of confidentiality.
After the filming: Post-production
The final phase begins after filming. Here, the raw footage is assembled into a finished film and then distributed. In our videos, the film taken on the day was edited to include audio sound effects (like monitor alarms) and background instrumental music was added. This process was managed using software which allowed the project team to collaborate on the edits. Once the first, rough cut of the video was completed, the second SME meeting was held to review video duration and highlight any errors. Final modifications were then made with captions and acknowledgements (such as funding sources, sites involved) added.
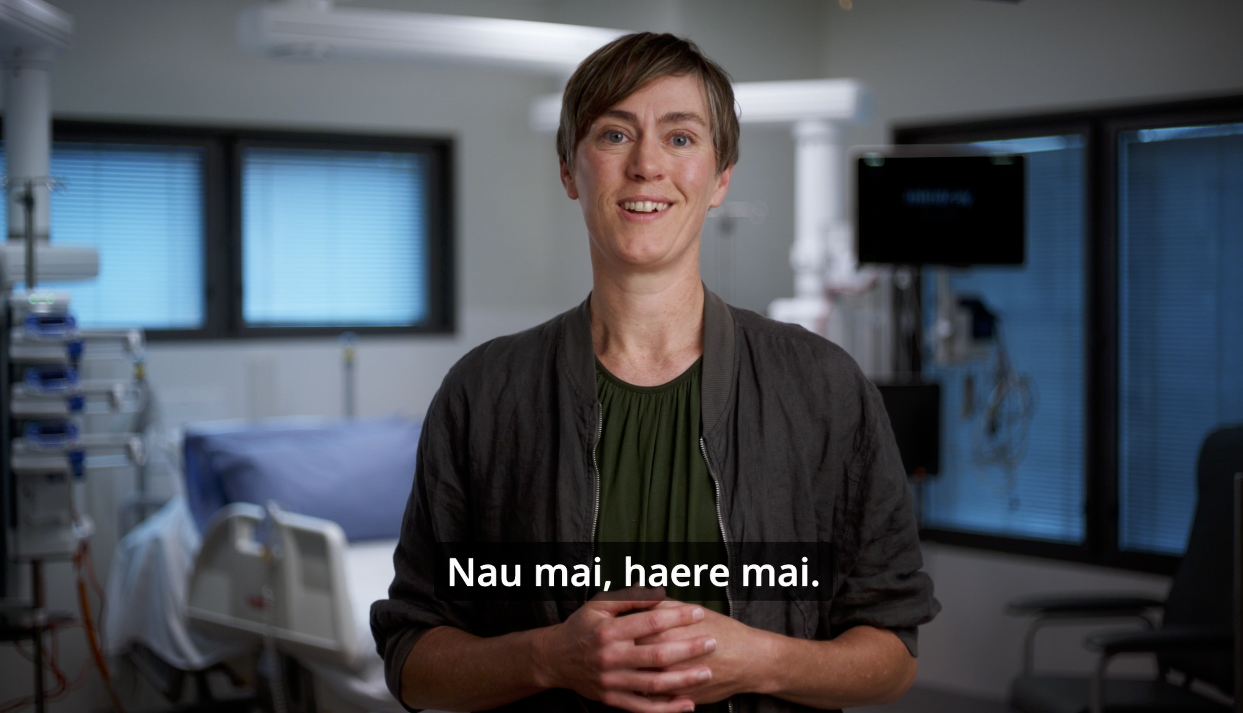
We offered our videos with English, reo Māori and Samoan language captioning (photo 2). This was informed by national demographics of the ICU patient population. Once the videos were finalised, the video links were sent to professional translation services. Re-connection was made with the Health New Zealand Te Whatu Ora web content and channels team for video upload and generation of URL and QR codes.
The final stage in post-production is dissemination. We developed digital posters, distributed via our SMEs and clinical networks, for display in patient and visitor-facing areas. The URL links were available for incorporation into local patient and visitor information resources. For wider reach, we also emailed information to key stakeholders including senior ICU staff across the motu and also wrote pieces for NZNO’s Critical Comment and Tū Mata Kōkiri Health New Zealand.
Final thoughts: It’s a wrap
As nurses, we work in environments and situations where we learn to be adaptable and resourceful. Whilst developing health education videos may seem out of scope, it is an exciting area that nurses have many existing transferable skills. The same project management skills used to plan a study day can be used to map out the project and organise the filming day. Existing clinical networks can be used to identify the project team and SME group. Video development is a team effort and we’ve found that people are genuinely supportive and keen to be involved, whether that be centre stage or in the wings.
It can also be exciting to learn new skills. It is a different way of thinking to develop a script that has generalisability across all critical care areas whilst having some depth of clinical detail. Thinking about the aesthetic of a video and how the film shots support the narrative of the video are new areas of learning too. Although this learning process can be challenging, it becomes incredibly rewarding when you see the finished video and hear feedback on how it’s been used.
REFERENCES
- Chatterjee, A., Strong, G., Milne-Ives, M., Meinert, E., Halkes, M., & Wyatt-Haines, E. (2021). The use of video for patient information and education: a scoping review of the variability and effectiveness of interventions’, Patient Education and Counseling 104: 2189-2199 https://doi.org/10.1016/j.pec.2021.02.009
- Tom, K., & Phang, PT. (2022). Effectiveness of the video medium to supplement preoperative patient education: A systematic review of the literature. Patient Education and Counseling 105: 1878-1887 https://doi.org/10.1016/j.pec.2022.01.013
- Checa-Checa, A., Medina-Maldonado. V., Ramírez, A., & Rodríguez Diez, J. (2025). Family support strategies during Intensive Care Unit: A Systematic Review. Inquiry: The Journal of Health Care Organization, Provision, and Financing 62:469580251368654. https://doi:10.1177/00469580251368654
- Svenningsen, H., Langhorn, L., Ågård, A.S., & Dreyer P. (2017). Post-ICU symptoms, consequences, and follow-up: an integrative review. Nursing in Critical Care 22:212-220. https://doi.org/10.1111/nicc.12165
- Mayer, R.E. (2010). Applying the science of learning to medical education: applying the science of learning. Medical Education 44: 543-549. https://10.1111/j.1365-2923.2010.03624.x
- Mayer, R.E. (2008). Applying the science of learning: evidence based principles for the design of multimedia instruction. American Psychologist 63: 760-769. https://psycnet.apa.org/doi/10.1037/0003-066X.63.8.760
- Mayer, R.E., & Moreno, R. (2003). Nine ways to reduce cognitive load in multimedia learning. Educational Psychologist 38: 43-52. https://doi.org/10.1207/S15326985EP3801_6
- Thomson A., Bridgstock, R., & Willems, C. (2014). “Teachers flipping out” beyond the online lecture: maximising the educational potential of video. Journal of Learning Design 7: 67-78. http://dx.doi.org/10.5204/jld.v7i3.209